SAP Hybris Tutorial – CMS Publish a Page to Online Mode | Unit 4
In the previous post, we told about the custom component on a template and view it on the page. But we can’t view this page on the Online mode. So, in this post, we are going to publish the page which used our custom template, from Staged mode to Online mode. Let’s get started.
Steps:
- Publish the page
- Publish directly a page in smartedit
- Publish the entire site in smartedit
- Publish page in Backoffice (BO)
- View the result
Let’s go into detail in each step.
Step 1: Publish the page
Approach 1: Publish directly a page in smartedit.
This approach helps us publish only content on this current page.
- Open smartedit at: https://apparel-uk.local:9091/smartedit (the link depends on your system)
- Login by your account when setup the hybris system.
- Go to the site we are working (apparel-uk), then choose the page which we want to publish.
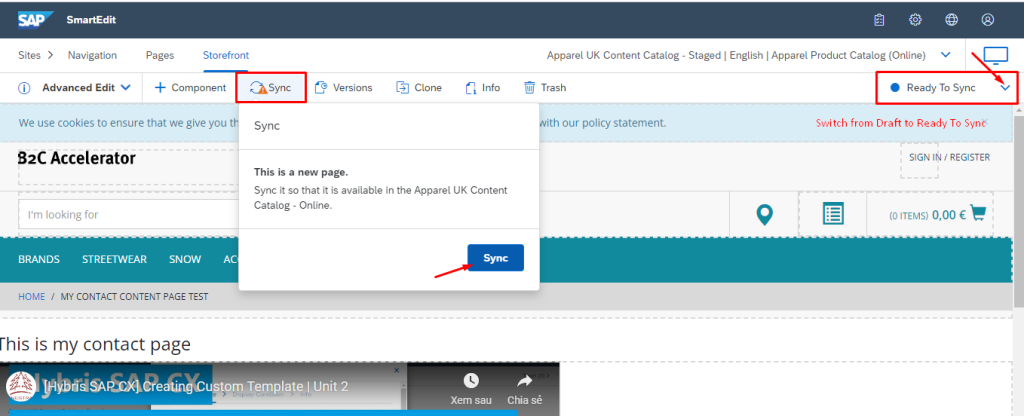
- Switch the page from draft to Ready to Sync
- On the Sync section on the menu, choose all and sync
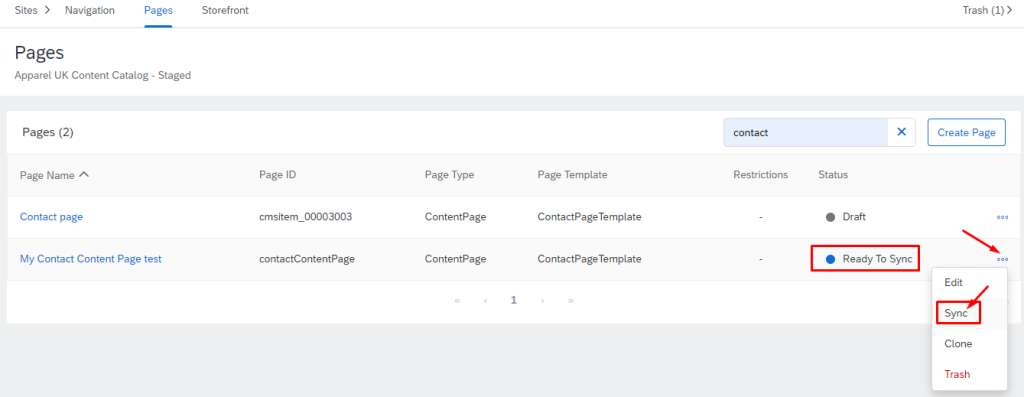
If our page was “Ready to sync”. we can sync at page level:
Errors:
ERROR 00000IIP::de.hybris.platform.catalog.jalo.synchronization.CatalogVersionSyncJob [CatalogVersionSyncMaster] sync ended with 1 unfinished items – see last sync media for details
ERROR 00000IIP::de.hybris.platform.catalog.jalo.synchronization.CatalogVersionSyncJob [CatalogVersionSyncJob] Finished synchronization in 0d 00h:00m:00s:314ms. There were errors during the synchronization!
INFO update-backofficeIndex-CronJob::de.hybris.platform.servicelayer.internal.jalo.ServicelayerJob [SolrIndexerJob] Started indexer cronjob.
Sometimes, sync directly on the page has issues on the other un-sync items on the page, we need to move to approach 2 or approach 3
Approach 2: Publish the entire site in smartedit
This approach publishes the entire content of the site which we choose. We are choosing apprel-uk site.
- Open smartedit at: https://apparel-uk.local:9091/smartedit (the link depends on your system)
- Login by your account when setup the hybris system.
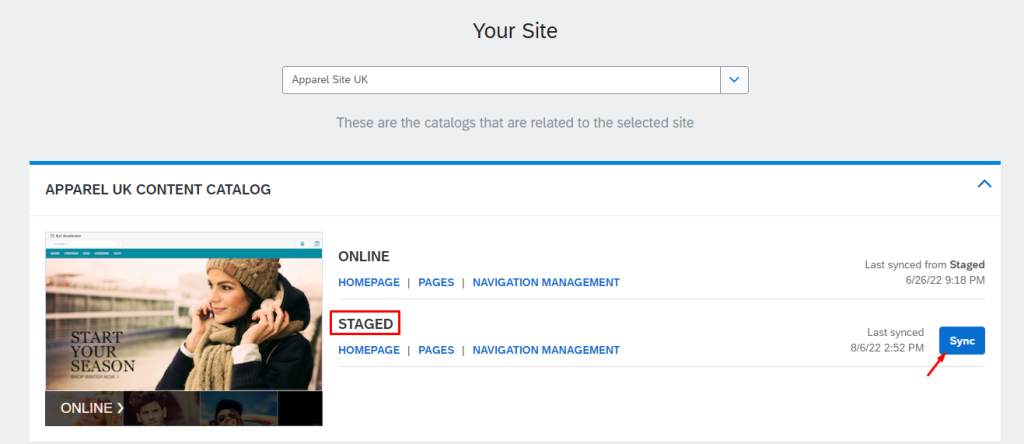
- Go to the site we are working (apparel-uk), Click on the Sync button and wait till it finishes.
Approach 3: Publish page in Backoffice (BO)
This approach publishes the entire content of the site which we choose. We are choosing apprel-uk site.
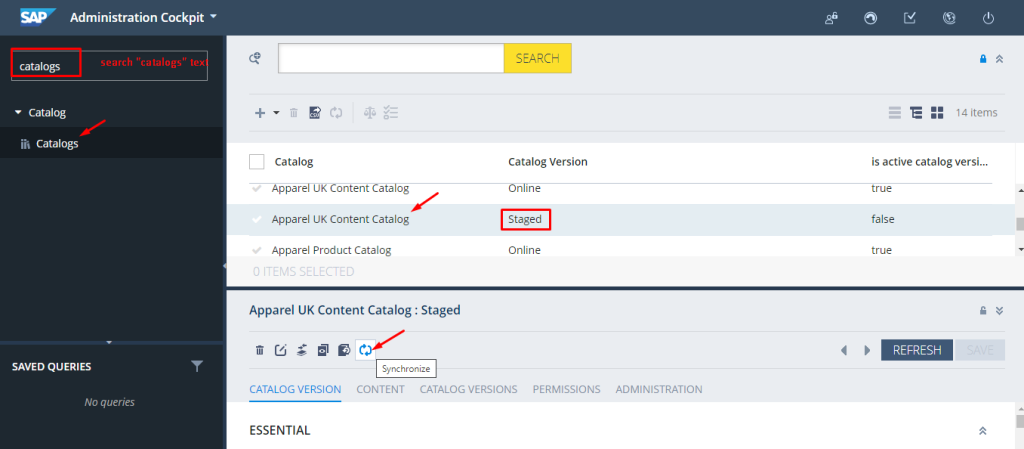
- Sign in to BO by your account: https://localhost:9091/backoffice/
- Search “catalogs” text
- Click on Catalogs section
- Choose the Apparel UK Content Catalog: Staged
- Click on the “Sync” action, and wait till it finishes.
Step 2: View the result
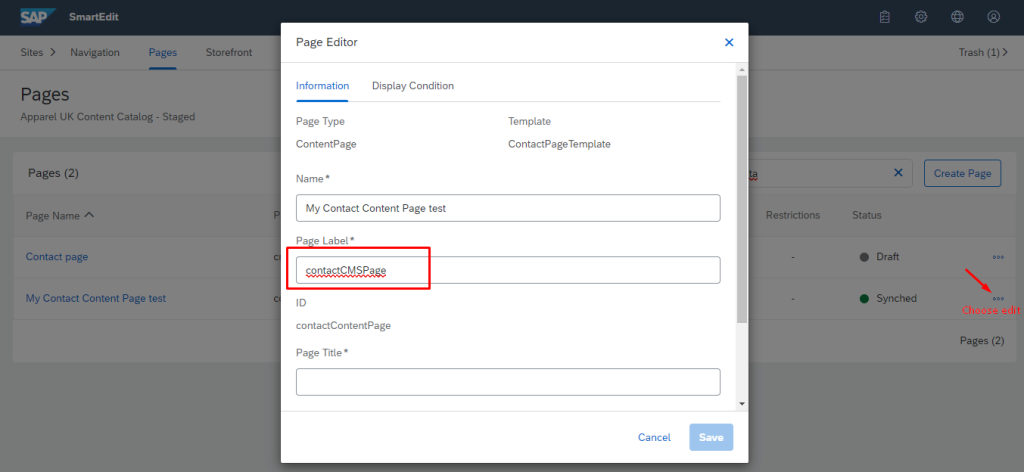
- Choose edit page to get the label id of page
- Open private mode on the browser and paste your labelID append after your root domain, view result now:
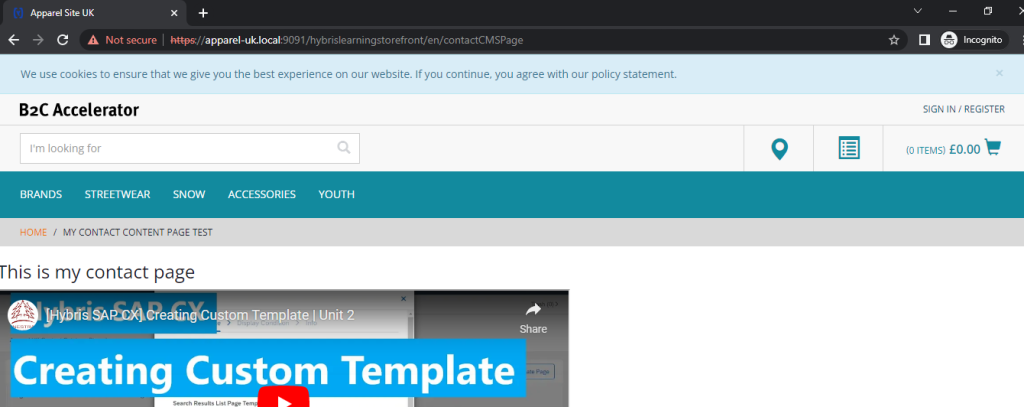
Congratulation.!!! You’ve done publish a page. In the next post, we will learn how to give an entry for a page, which means linking our page to any navigation like menus on the header or footer.
Happy Coding.!!! <3
